- docs
- FlowFuse User Manuals
- Using FlowFuse
- Getting Started
- FlowFuse Concepts
- Changing the Stack
- Device Groups
- DevOps Pipelines
- Environment Variables
- FlowFuse File Nodes
- FlowFuse Persistent Context
- FlowFuse Project Nodes
- High Availability mode
- Instance Settings
- Logging
- Shared Team Library
- Snapshots
- Teams
- User Settings
- FlowFuse API
- Migrating a Node-RED project to FlowFuse
- Device Agent
- Device Agent
- FlowFuse Device Agent Introduction
- Quick Start
- Installation
- Quick Start with Web UI
- Register your Device
- Running the Agent
- Deploying your Flows
- Hardware Guides
- FlowFuse Cloud
- FlowFuse Cloud
- FlowFuse Self-Hosted
- Installing FlowFuse
- Overview
- Configuring FlowFuse
- DNS Setup
- Docker install
- Email configuration
- First Run Setup
- FlowFuse File Storage
- Install FlowFuse on Kubernetes
- Local Install
- Upgrading FlowFuse
- Administering FlowFuse
- Administering FlowFuse
- Administrator configuration for SSO
- licensing
- Monitoring
- Telemetry
- User Management
- Support
- Community Support
- Premium Support
- Debugging Node-RED issues
- Contributing
- Contributing to FlowFuse
# Shared Team Library
Node-RED allows you to import and export flows and functions to a local library. This is helpful for saving pieces of flow that you want to reuse.
With FlowFuse Premium, each Node-RED instance has access to a Team Library that makes it very easy to share flows and functions without having to manually copy them around.
For example, you may have a standard set of flows that you want each Node-RED instance to include. By exporting them to the Team Library, you can quickly import them wherever you want to use them.
A short video is available on how to use this feature.
# Exporting flows
To export flows to the library within the Node-RED editor:
- Select the nodes to be included
- Open the Export Dialog (
Main Menu -> Export, orCtrl/Cmd-E) - Select the
Team Librarytab - Enter a name for the library entry
- Click Export
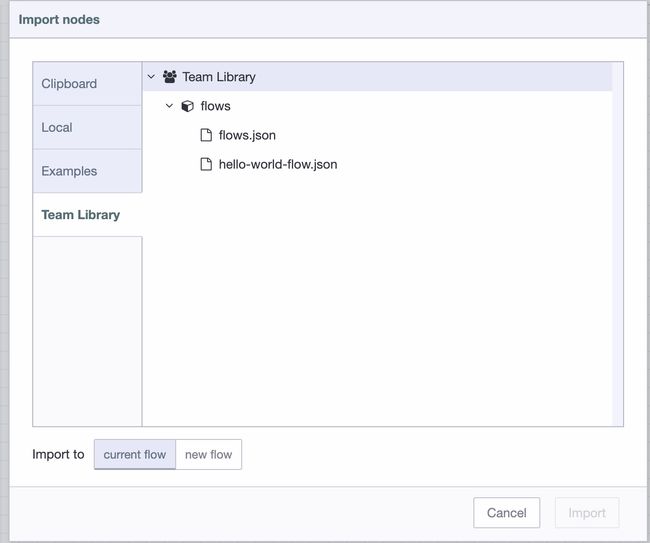
# Importing flows
To import flows within the Node-RED editor:
- Open the Import Dialog (
Main Menu -> Import, orCtrl/Cmd-I) - Select the 'Team Library' tab
- Select the flow to import
- Click Import
- Place the imported nodes within your flows
# Viewing Team Library
It is possible to explore your Team Library within FlowFuse by clicking "Library" in your Team options.
You can inspect the contents of any .json flow file, or .js function file here too.