- docs
- FlowFuse User Manuals
- Using FlowFuse
- Getting Started
- FlowFuse Concepts
- Changing the Stack
- Device Groups
- DevOps Pipelines
- Environment Variables
- FlowFuse File Nodes
- FlowFuse Persistent Context
- FlowFuse Project Nodes
- High Availability mode
- Instance Settings
- Logging
- Shared Team Library
- Snapshots
- Teams
- User Settings
- FlowFuse API
- Migrating a Node-RED project to FlowFuse
- Device Agent
- Device Agent
- FlowFuse Device Agent Introduction
- Quick Start
- Installation
- Quick Start with Web UI
- Register your Device
- Running the Agent
- Deploying your Flows
- Hardware Guides
- FlowFuse Cloud
- FlowFuse Cloud
- FlowFuse Self-Hosted
- Installing FlowFuse
- Overview
- Configuring FlowFuse
- DNS Setup
- Docker install
- Email configuration
- First Run Setup
- FlowFuse File Storage
- Install FlowFuse on Kubernetes
- Local Install
- Upgrading FlowFuse
- Administering FlowFuse
- Administering FlowFuse
- Administrator configuration for SSO
- licensing
- Monitoring
- Telemetry
- User Management
- Support
- Community Support
- Premium Support
- Debugging Node-RED issues
- Contributing
- Contributing to FlowFuse
# Developing Flows on Your Device
# Add Device to FlowFuse
# Prerequisites
If you do not already have the device agent installed, follow the install instructions, otherwise, proceed to the next step.
NOTE: It is good practice to keep your Device Agent up to date. Update instructions are also provided in the link above.
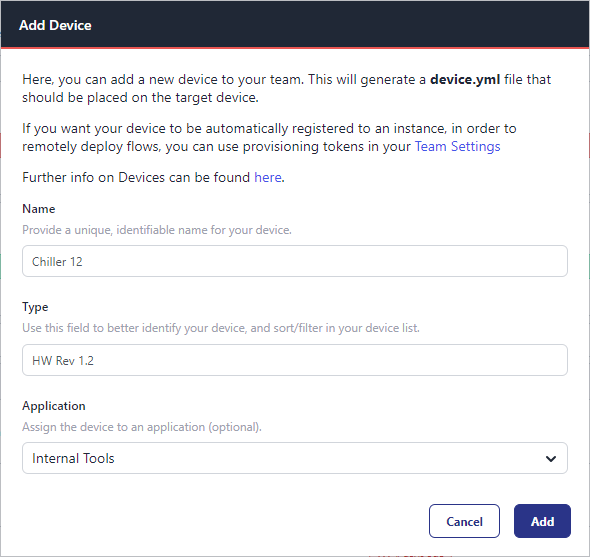
# Step 1: Add a new Device
-
Open your web browser and go to your FlowFuse application page.
-
Navigate to the Devices section.
-
Click Add Device.
-
Fill in the Device Name & Device Type and select an Application
-
Click Add
-
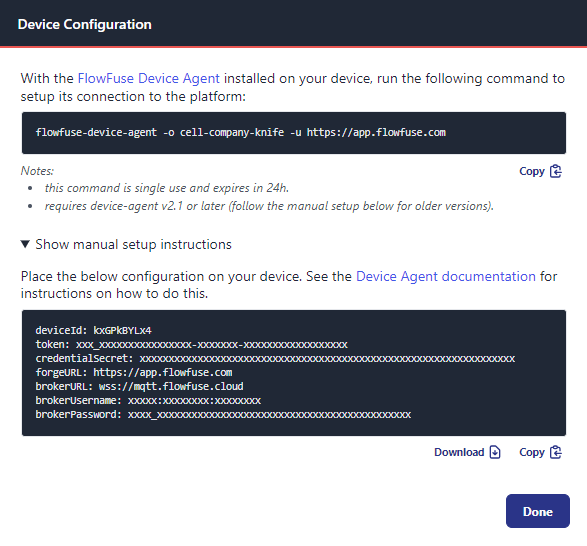
You will be presented with a Device Configuration that you will need in the next step. (Do not close this window just yet.)
# Step 2: Start the Device Agent with the Web UI enabled
-
If you have access to a Terminal/Command Prompt and run the following command:
flowfuse-device-agent --ui --ui-user admin --ui-pass password --ui-port 8081You can find more details about the Device Agent flags here
-
If the Device Agent is pre-installed on your hardware, follow the manufacturers instructions to start the device agent with the Web UI enabled.
-
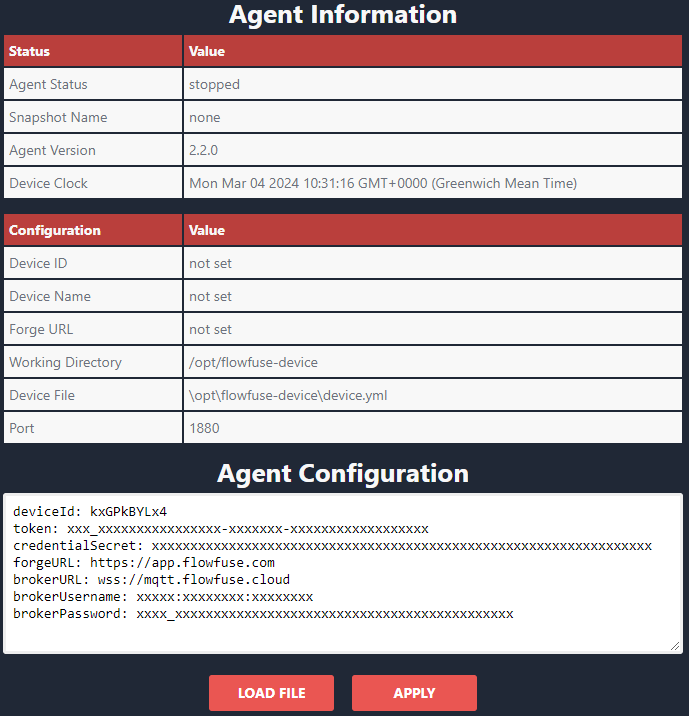
Copy the device configuration from the previous step and paste it into the Agent Configuration field.
-
Click
Apply.
Your device is now added to FlowFuse and ready to be used.
# Develop on Device
# Enable Developer Mode
-
Navigate to Applications and select the application your device was added to.
-
Go to the Devices tab within the application.
-
Locate your newly added device and click on your device.
-
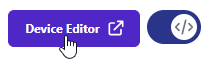
Then Click Developer Mode toggle button on upper right.

-
This will enable editor access for your device.
-
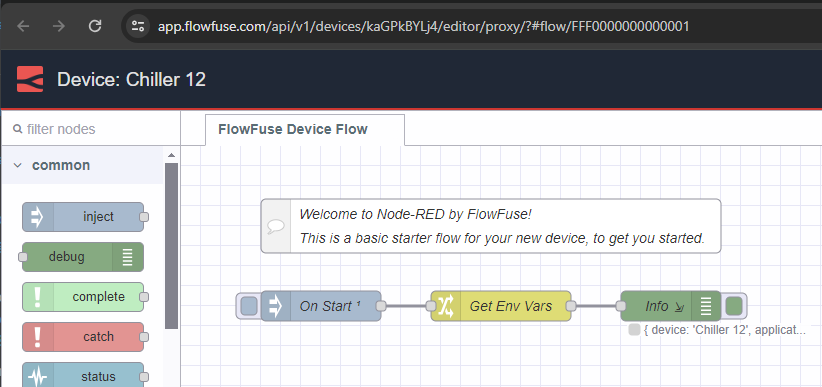
Clicking Device Editor will launch the editor.
# Next Steps
Now you have a device connected to the platform, there are many features you can use to manage and monitor your devices. Here are a few to get you started: