- docs
- FlowFuse User Manuals
- Using FlowFuse
- Getting Started
- FlowFuse Concepts
- Changing the Stack
- Device Groups
- DevOps Pipelines
- Environment Variables
- FlowFuse File Nodes
- FlowFuse Persistent Context
- FlowFuse Project Nodes
- High Availability mode
- Instance Settings
- Logging
- Shared Team Library
- Snapshots
- Teams
- User Settings
- FlowFuse API
- Migrating a Node-RED project to FlowFuse
- Device Agent
- Device Agent
- FlowFuse Device Agent Introduction
- Quick Start
- Installation
- Quick Start with Web UI
- Register your Device
- Running the Agent
- Deploying your Flows
- Hardware Guides
- FlowFuse Cloud
- FlowFuse Cloud
- FlowFuse Self-Hosted
- Installing FlowFuse
- Overview
- Configuring FlowFuse
- DNS Setup
- Docker install
- Email configuration
- First Run Setup
- FlowFuse File Storage
- Install FlowFuse on Kubernetes
- Local Install
- Upgrading FlowFuse
- Administering FlowFuse
- Administering FlowFuse
- Administrator configuration for SSO
- licensing
- Monitoring
- Telemetry
- User Management
- Support
- Community Support
- Premium Support
- Debugging Node-RED issues
- Contributing
- Contributing to FlowFuse
# SAML Single-Sign On
This feature is only available on self-hosted Enterprise licensed instances of FlowFuse.
FlowFuse allows users to sign in through their SAML identity provider, such as Google Workspace.
The platform can be configured with multiple SAML configurations and uses the user's email domain to identify which identity provider should be used.
The user must already exist on the FlowFuse platform before they can sign in via SSO.
Once enabled for a particular email domain, regular users on that domain will be directed to the Identity Provider in order to log in. They will no longer be able to log in with their local password, nor will they be able to change their email address in User Settings.
Admin users will still be able to log in with their original FlowFuse username/password - this ensures they don't get locked out of the platform if there is a problem with the Identity Provider configuration.
# Managing SAML SSO Configurations
The SAML SSO Configurations are managed by the platform Administrator under the
Admin Settings > Settings > SSO section.
To fully configure SAML SSO, you will need to generate a configuration in FlowFuse, provide some of the generated values to your Identity Provider, and copy back some values they provide.
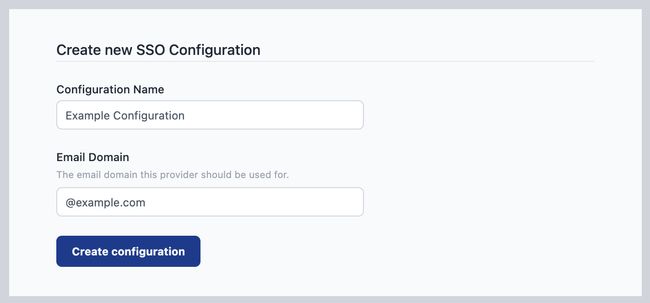
# Create a SAML SSO Configuration
-
Click 'Create SSO SAML Configuration' to create a new config
-
Give the configuration a name to help identify it, and provide the email domain name this configuration should apply to.
-
Click 'Create configuration'
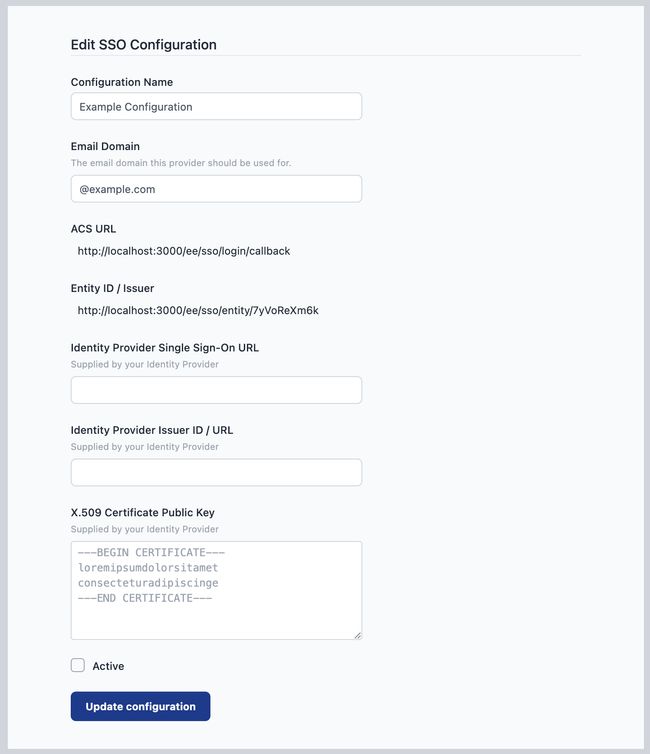
At this point, the configuration has been created and metadata generated for the configuration, but it is not active.
-
Copy the
ACS URLandEntity ID / Issuervalues as you will need to configure your Identity Provider with these values.
You can save the configuration at any time by clicking the Update configuration
button. The configuration will only be enabled when you tick the active checkbox and save the changes.
# Configure your Identify Provider
Every Identity Provider uses slightly different terminology and varies what information they require and what they provide. This can make it a tricky task to complete.
We provide specific guides for the providers we have verified below.
If you have a working configuration for a provider not listed here, please do share the details so we can add them to the list.
The general points are:
-
Your Identity Provider will supply you with some of the following values that should be entered into your FlowFuse SAML SSO Configuration:
Single Sign-On URL- also referred to as 'SAML Endpoint', 'Login URL' or 'IdP SSO URL'.Issuer ID / URLX.509 Certification Public Key- the public key of a certificate used to sign SAML requests.
-
Configure the
NameIDSAML option to beEmailAddressand have it return the email of the user logging in. This is how FlowFuse will verify they are a known user on the platform.
# Enable your SAML SSO Configuration
Once you have setup both sides of the configuration you can enable it for use by ticking the active checkbox and clicking Update configuration.
## Managing Team Membership with SAML Groups
Some SAML providers allow user group information to be shared as part of the sign-in process. When properly configured, this can be used to manage what FlowFuse teams a user has access to.
To enable this option, select the Manage roles using group assertions in the SSO configuration.
The following configuration options should then be set:
Group Assertion Name- this is used to identify the group membership information in the response sent by the Identity Provider. It defaults toff-rolesbut can be customised if the Identify Provider requires it.Team Scope- this determines what teams can be managed using this configuration. There are two options:Apply to all teams- this will allow the SAML groups to manage all teams on the platform. This is suitable for a self-hosted installation of FlowFuse with a single SSO configuration for all users on the platform.Apply to selected teams- this will restrict what teams can be managed to the provided list. This is suitable for shared-tenancy platforms with multiple SSO configurations for different groups of users, such as FlowFuse Cloud. When this option is selected, an additional option is available -Allow users to be in other teams. This will allow users who sign-in via this SSO configuration to be members of teams not in the list above. Their membership of those teams will not be managed by the SSO groups. If that option is disabled, then the user will be removed from any teams not in the list above.
# SAML Groups configuration
A user's team membership is managed by what groups they are in. When the user logs in, the SAML provider must be configured to provide a list of groups they are a member of as a SAML assertion.
The group name is used to identify a team, using its slug property, and the user's role in the team. The name must take the form ff-<team>-<role>. For example, the group ff-development-owner will container the owners of the team development.
The valid roles for a user in a team are:
ownermemberviewerdashboard
Note: this uses the team slug property to identify the team. This has been chosen to simplify managing the groups in the SAML Provider - rather than using the team's id. However, a team's slug can be changed by a team owner. Doing so will break the link between the group and the team membership - so should only be done with care.
# Providers
The following is a non-exhaustive list of the providers that are known to work with FlowFuse SAML SSO.
# Microsoft Entra
Microsoft provide a guide for creating a custom SAML Application here.
The following table maps the Entra terminology to the FlowFuse settings.
| FlowFuse Setting | Entra Setting |
|---|---|
ACS URL |
Reply URL (Assertion Consumer Service URL) |
Identity Provider Single Sign-On URL |
App Federation Metadata Url |
Identity Provider Issuer ID / URL |
Entity ID |
X.509 Certificate Public Key |
Certificate (Base64) |
Within the SAML Signing Certificate configuration, the Signing Option must be set to Sign SAML response and assertion.
The Unique User Identifier (Name ID) claim must be configured to return the value of the user.mail source attribute.
# Group Membership Configuration
By default, when enabled, Entra will share group assertions under the name http://schemas.microsoft.com/ws/2008/06/identity/claims/groups and provides the groups as a list of object ids.
Either the Group Assertion Name should be set to this name, or Entra configured to use a custom assertion name that matches the FlowFuse SSO Configuration value.
Entra must also be configured to return group names rather than object ids.
# Google Workspace
Google provide a guide for creating a custom SAML Application here.
Google Workspace only supports HTTPS-based SSO URLs. You cannot use it when developing locally using http://localhost:3000.
The following table maps the Google Workspace terminology to the FlowFuse settings.
| FlowFuse Setting | Google Workspace Setting |
|---|---|
Identity Provider Single Sign-On URL |
SSO URL |
Identity Provider Issuer ID / URL |
Entity ID |
X.509 Certificate Public Key |
Certificate |
Within the Service provider details configuration, the Signed response option must be enabled.
# OneLogin
Follow this guide
to create a OneLogin SAML Test Connector.
| FlowFuse Setting | OneLogin Setting |
|---|---|
Identity Provider Single Sign-On URL |
SAML 2.0 Endpoint (HTTP) |
Identity Provider Issuer ID / URL |
Issuer URL |
X.509 Certificate Public Key |
X.509 Certificate |
# Okta
Within your Okta Admin dashboard, browse the App Integration catalog and add a new instance of the SAML Service Provider integration.
On the Sign-On Options section, ensure SAML 2.0 is selected. Below that section you will see a notice saying:
SAML 2.0 in not configured until you complete the setup instructions.
Click the 'View setup instructions' button to open the page in a new window.
Follow the instructions on that - copying the Identity Provider Issuer,
Identity Provider HTTP POST URL and Identity Provider Certificate values into the FlowFuse SSO configuration.
Back on the Okta SAML Application configuration page, under the Advanced Sign-on Settings
section enter the Assertion Consumer Service URL and Service Provider Entity Id
from the FlowFuse SSO configuration.
Under Credential Details section, change the Application username format to Email.
# Group Membership Configuration
To configure Okta to return Group assertions, edit the Settings of the SAML Service Provider's SAML 2.0 configuration. Expand the 'Attributes' section and add a Group Attribute Statement.
The name must match the Group Assertion Name in the FlowFuse SSO configuration (default: ff-roles). You can optionally add a filter of ff- so that it only returns groups used by FlowFuse.
# Keycloak
Within your Keycloak Admin Console, create a new Client with the following settings:
Under the General Settings:
- Set
Client typetoSAML - Set the
Client IDto theEntity ID / Issuervalue from the FlowFuse SSO configuration.
Under the Login Settings:
- Set
Valid redirect URIsto theACS URLvalue from the FlowFuse SSO configuration.
Once created and you are shown the full client configuration, make the following additional changes:
- Set
Name ID formattoemail - Under the 'Keys' tab, turn off
Client signature required
Save the changes.
Next, select the 'Download adapter config' option under the 'Action' dropdown menu. Select the 'Mod Auth Mellon files' format and click Download.
This will download a zip file. Extract the zip and open the idp-metadata.xml file in a text editor.
The final task is to copy some of the contents of the XML file into the FlowFuse SSO configuration.
- Copy the value of the
entityIDattribute into theIdentity Provider Issuer ID / URLproperty - Find one of the
md:SingleSignOnServicetags and copy the value of itsLocationattribute into theIdentity Provider Single Sign-On URLproperty - Copy the contents of the
ds:X509Certificatetag into theX.509 Certificate Public Keyproperty